- Features
- Description
- Similar Items
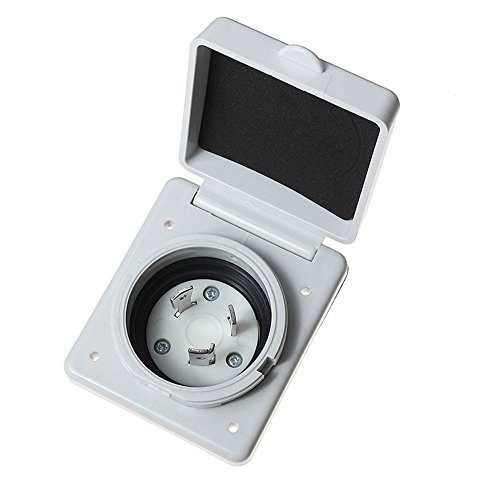
30Amp 125Volt,easy twist lock power inlet, NEMA L5-30R, ETL Approved, safe to use.
RV 30 amp power cord inlet - Heavy-duty construction,corrosion resistant materials.
30 amp power connector - 3-wire:Black-Load(125Volt),White-Neutral,Green-Equipment ground.
The twist lock plug requires the use of 8AWG or 10AWG wire.Note:Do not use the small gauge wire as this will result in overheating and possible electrical fire.
Hole Saw(30amp 2-7/8″hole saw).1/8"Drill Bit.Quickly locks the cord set to the power supply 30 amp shore power inlet.
Binding:
Tools & Home ImprovementBrand:
MalxsEAN:
0754680760517Label:
MalxsManufacturer:
MalxsModel:
Size:
30 AmpWarranty:
WARING:
The inlet is not to be connected to power prior to installation.Failure to comply with this instruction could result in an electrical failure,fire and electrocution.
New Installation
1. Determine mounting location in hull.Be careful that the location you select for the mounting hole does not go through any electrical wiring,plumbing or other obstruction.All power tools must be properly grounded.
2. Mark the installation location and cut opening in hull using hole saw(30amp 2-7/8"diameter hole.)
3. Place the inlet in the opening and align so that the inlet is square with the hull.Use the inlet as a template and mark the mounting hole location with a pencil.Remove inlet and drill mounting holes using 1/8"drill bit.
4. Remove the rear safety enclosure from the inlet.
5. Pull internal wiring through hull opening.Note:the 30amp inlet requires the use of 8AWG or 10AWG wire.Do not use the small gauge wire as this will result in overheating and possible electrical fire.
6. Thread the wiring through the rear safety enclosure and the strain relief on rear enclosure(if included),then slide the mounting gasket over the wiring.
7. Back off terminal screws on the rear housing of the inlet.
8. Strip wire end to 3/4.Make sure the wire strands are clean and not corroded.If necessary,cut back the wire until clean wire in uncovered.Do not solder the ends of the wire.Insert wires into color coded openings on the back of the inlet.Tighten terminal screws to 20 in.-lbs.torque.Make certain there is no wire insulation nder any terminal.
9. Tighten the strain relief clamp screws until they are tight around the wiring.Slide the rear safety enclosure onto the back of the inlet.
10. Position the gasket and inlet over the hull opening,align the mounting holes and attach the inlet to the hull with screws.
11. Use #8 pan head stainless steel screws to install the inlet.


