- Features
- Description
- Similar Items
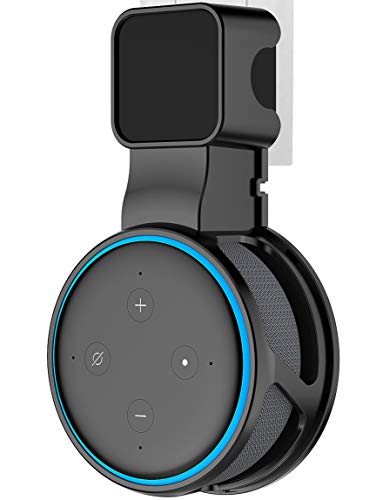
✔【Compatibility】Compatible with *Echo Dot (3rd Gen)*, NOT FOR other Echo generation.
✔【No Cable Tangles】The cable management of this holder can neatly organize and hide away the cable behind, avoid messy and unsightly hanging cords.
✔【Safe & Stable】Widened design of the stand makes it more stable to support the Echo 3rd Gen.
✔【Original Sound】Hollow design remains the original sound of the Echo 3rd Gen. NOT reducing the volume and quality of it.
✔【Easy Installation】Put the outlet into the holder and wrap the cable behind this stand, insert the Echo Dot 3rd Gen into the stand and plug the mount into the wall socket, not drilling walls required. More convenient to place your smart speaker in your home.
Binding:
Brand:
SPIDERCASEEAN:
0751677193211Label:
SPIDERCASEManufacturer:
SPIDERCASEModel:
Size:
Warranty:
Spidercase Outlet Wall Mount Holder, Plug Stand for Dot (3rd Gen) ONLY
Add this Holder with your 3rd Gen to Any Room
Compatibility
Suitable for All-new Dot (3rd Gen) ONLY
No Cable Tangles
Neat winding for your Dot 3rd Gen, no more bothering for the messy winding.
Safe & Stable
Steady and not shaking when plug the outlet with the Dot 3rd Gen in the stand into the wall plug.
Clear Sound
Hollow design of the stand have no effect on the sound transmission of your Dot 3rd Gen.
Easy Installation
1. Plug the power adapter into the holder, and wind the power cable into the winding coil on the back of the holder.
2. Wrap the power cord around the groove and circle it in turn.
3. Winding completed, draw the power cable via the slot on the right as shown in image.
4. Insert Dot with the power port, then put it into the stand.
5. Plug the mount into the wall socket.


